Refractory Brick Oven Guide: Firebrick, Mortar, Thickness & First-Fire Safety
Jason Gong
Founder & Sales Director · Product Inquiry Contact
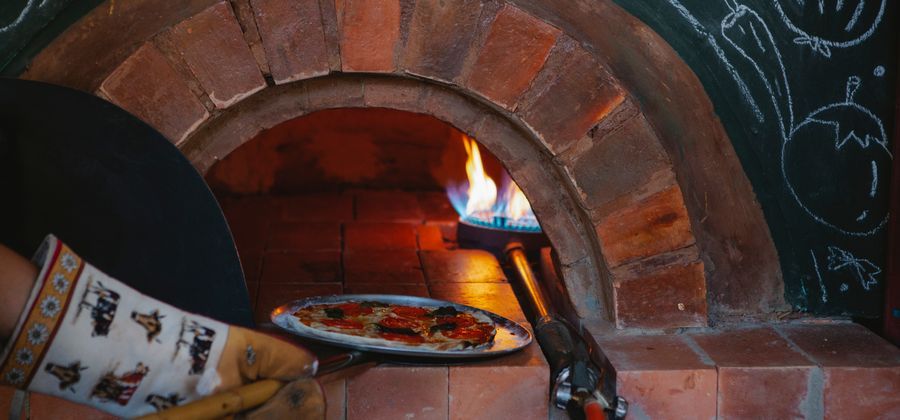
A refractory brick oven uses medium-duty fireclay fire bricks (rated to 1,480°C) for the dome and cooking floor. The floor operates at 350–500°C; the dome at 300–450°C — well within medium-duty range. Use split fire bricks (9×4.5×1.25 inches) for the cooking floor and full or half bricks for the dome walls. Joints must be refractory mortar at 3 mm maximum. A correctly built brick oven lasts 30+ years and can be repaired brick by brick.
floor temperature
maximum rating
correctly built brick oven
Range and safety note. Temperatures, brick counts, prices and service-life examples are material- and design-specific planning ranges. Follow the selected brick and mortar datasheets, local fire code, ventilation requirements and the oven manufacturer’s curing schedule; do not treat a lifespan or first-fire temperature as a guarantee.
Why refractory brick, not ordinary brick
A refractory brick oven is not simply a brick-shaped enclosure that happens to get hot. The bricks lining the cooking chamber — floor, dome, arch, and side walls — are exposed to temperatures that would destroy standard clay bricks within a single firing season.
Common face brick is fired at 900–1,050°C during manufacture and rated for ambient temperature structural use. Inside a wood-fired oven at 400–500°C, it absorbs heat unevenly, expands at the wrong rate, and progressively spalls. The technical term for this is "the floor of your pizza oven slowly turning into rubble."
Refractory fire brick is fired at 1,300–1,450°C and rated for direct thermal cycling from cold to 500°C and back, thousands of times. The 35% alumina content and mullite crystal structure give it thermal stability that ordinary brick simply does not have.
What temperatures a brick oven actually reaches
| Zone | Operating temperature | Notes |
|---|---|---|
| Cooking floor (peak) | 400–500°C | At Neapolitan pizza temperature; bread bakes at 280–340°C floor |
| Dome interior (peak) | 380–480°C | Air temperature in the chamber |
| Dome brick surface | 300–450°C | Brick surface temperature, not interior |
| Arch / entrance | 200–350°C | Lower temperature zone |
| Flue / chimney throat | 150–300°C | Draft zone, gases cooling |
These temperatures sit comfortably within medium-duty fireclay brick's 1,480°C rating. There is a 980–1,000°C safety margin above normal oven operating temperature. The margin is deliberate — it accounts for occasional over-firing, proximity to the fire during initial heat-up, and temperature variation across the oven.
Fire brick specifications for pizza ovens
| Specification | Target value | Why it matters |
|---|---|---|
| Duty grade | Medium-duty (ASTM C27) | Rated to 1,480°C — more than sufficient for oven temperatures |
| Al₂O₃ content | 30–40% | Sufficient refractoriness for pizza oven temperatures |
| Apparent porosity | 15–22% | Lower porosity = better food hygiene; higher = better thermal shock resistance |
| Thermal conductivity | 0.8–1.2 W/m·K | Determines how quickly the floor stores and releases heat |
| Floor brick size | 9 × 4.5 × 1.25 in (split) | Thin enough for a flat cooking surface, sufficient thermal mass |
| Dome brick size | 9 × 4.5 × 2.5 in (full) | Structural and thermal mass for dome construction |
One point on porosity: refractory bricks for pizza ovens come into indirect contact with food through radiant heat. Lower porosity (below 18%) reduces the possibility of contamination from combustion residue penetrating the brick surface. Food-grade refractory bricks with low porosity and no chemical additives are the appropriate specification for cooking applications.
The cooking floor: thickness and thermal mass
The cooking floor is the most important surface in a refractory brick oven. It is the direct contact surface with food — and the primary thermal battery of the oven.
Floor construction: Split fire bricks (9×4.5×1.25 inches / 229×114×32 mm) are the standard. They are laid flat on a base of full bricks or a dense refractory slab, with joints kept to 2–3 mm maximum and no mortar used between the split bricks themselves — just a dry-fit. Mortar in cooking floor joints traps debris and creates hygiene issues. The bricks sit on a mortared base; the cooking surface bricks are dry-laid.
Firebrics field note: Thermal mass determines baking sessions, not just single-pizza throughput. A properly built 90 cm inner diameter brick oven with 65 mm of floor brick (32 mm split on 33 mm base) stores enough heat for 4–6 hours of continuous pizza baking after the fire is moved to the side. An oven with a single-layer split brick floor (32 mm total) is ready faster but exhausts its stored heat in 90–120 minutes. If you are baking for more than 20 people or doing an extended session, the thicker floor is not a luxury — it is the spec you actually need.
Dome construction: shape, brick layout, arch
The traditional wood-fired pizza oven dome is a hemisphere or three-quarter sphere approximately 40–45% of the inner diameter in height. A 90 cm inner diameter oven has a dome height of approximately 36–40 cm at the centre. This ratio creates the rolling heat circulation pattern that distributes radiant heat evenly across the oven.
Dome bricks are typically full-size firebricks (9×4.5×2.5 inches) cut at angles to follow the dome curve. The cutting is done with a masonry saw. The taper cut is calculated for each course based on the dome radius; the angle increases as you move toward the crown.
The arch (entry) is built on a temporary wooden form and uses the same firebrick as the dome. The arch transfers the dome's weight to the oven's side walls — it must be mortared with full joints. The arch key brick at the top is the last piece placed.
Brick oven vs castable refractory dome
| Factor | Brick oven (firebrick dome) | Castable refractory dome |
|---|---|---|
| Build time | Longer (weeks for large oven) | Faster (days) |
| Thermal mass | High | Moderate (thinner walls typical) |
| Longevity | 30+ years with proper construction | 10–20 years under heavy daily use |
| Repairability | Individual bricks replaceable | Requires full dome replacement if cracking severe |
| Crack resistance (daily use) | High (joints accommodate movement) | Moderate (monolithic structure cracks under repeated cycling) |
| Cost (materials) | Higher | Lower |
For a garden pizza oven fired weekly, a castable dome is a reasonable choice. For a restaurant or a serious baking operation firing daily, brick construction is the specification that survives the use cycle. The most common story: a restaurant's castable dome develops hairline cracks after three years of two-session-per-day operation. By year five, sections fragment. Full dome replacement costs more than a new brick oven would have.
Refractory mortar: the joint that holds everything together
Every mortar joint in the dome and arch must be refractory mortar rated to at least 1,260°C. Standard Portland mortar degrades at 300°C — below the dome's normal operating temperature. It crumbles, the joints open, heat escapes, and the dome becomes structurally compromised.
Refractory mortar for pizza ovens is typically premixed alumina-silica mortar in tubs. Apply it to both surfaces of each brick. Set the brick, press firmly, and remove excess immediately. Keep joints to 3 mm maximum on dome bricks and 2 mm on cooking floor bricks.
Note: Dome joint thickness varies naturally due to the angled cuts. The inner face of each dome joint should be 1–2 mm; the outer face is wider due to the brick angle. This is correct and expected. Consistent inner-face joint width is what matters for thermal performance.
Insulating the oven shell
The firebrick dome and floor are the thermal core. The insulation layer wraps the outside of the firebrick and prevents heat loss through the oven shell.
Two common insulation approaches:
- Perlite-cement render: A mix of roughly 4:1 perlite to Portland cement by volume, applied in a 50–75 mm layer over the dome exterior. Perlite's low thermal conductivity (0.04–0.06 W/m·K) dramatically reduces heat loss. The most common DIY approach.
- Ceramic fibre blanket: Wrap the dome exterior in one or two layers of 25 mm ceramic fibre blanket (Kaowool or equivalent). More expensive but better insulation value, and easier to apply to curved surfaces. Cover with a render finish for weather protection.
Insulating fire brick (IFB) can also be used as an outer layer — a dome of firebrick followed by a layer of K26 IFB then a render finish is the approach used in many commercial installations.
First firing: curing schedule
Never fire a new refractory brick oven to full temperature on the first session. The mortar joints contain residual water that must be driven off gradually. Steam trapped in a joint at full temperature generates enough pressure to crack both the mortar and the adjacent brick.
Day 1: Small fire, 30 minutes
Use just a handful of dry kindling. Get a small fire going and let it burn down. Open the oven door slightly to allow steam to escape. Let the oven cool completely overnight.
Day 2: Slightly larger fire, 45 minutes
Add a few small logs after the kindling catches. Aim for 150–200°C floor temperature. Cool overnight.
Day 3: Medium fire, 60–90 minutes
Target 250–300°C. You should see less steam than on Day 1. The mortar is curing. Cool overnight.
Days 4–5: Full heat
Build a proper fire to full pizza temperature (400–480°C floor). By this point, residual moisture has been expelled and the mortar has achieved adequate cure strength.
Why brick ovens fail early
- Wrong mortar. Portland mortar in dome joints degrades at 300°C. Joints open, heat escapes. Refractory mortar is non-negotiable.
- No curing period. Full-temperature firing on a freshly built oven generates steam pressure that cracks mortar joints. The four-day cure schedule is not optional.
- Common brick in the dome or floor. Standard clay brick spalls at pizza oven temperatures within a season. Only refractory firebrick belongs inside the oven.
- No expansion joints in long walls. For ovens over 120 cm diameter or with long straight wall sections, the absence of expansion joints allows compressive stress to build up over firing cycles, eventually buckling the wall.
- Water ingress. Rain entering an uncovered oven saturates the brick. The first subsequent firing generates steam inside the brick's pore structure, causing spalling from the inside.
Sourcing fire brick for a pizza oven build?
Firebrics supplies medium-duty fireclay brick in split and full sizes, with full specification documentation. Suitable for residential pizza ovens and commercial wood-fired installations. Export to over 40 countries.
Request a QuoteFurther reading
- Masonry oven — Wikipedia
- Refractory Brick Types, Properties & Applications
- Fire Brick Installation Considerations
- Firebrics product range